

Install the official Ollama Windows installer, or run the PowerShell one-liner if you prefer the command line, and you'll have a working ollama CLI plus a local API at http://localhost:11434 in under five minutes. It runs on Windows 10 22H2 or later, and a GPU is optional but strongly recommended for speed. Once installed, you pull a model with a simple command and start chatting from your terminal immediately.
TL;DR:
- Drivers for NVIDIA and AMD GPUs must be current; outdated drivers cause Ollama to fall back on CPU mode, slowing performance significantly.
- A model smaller than 2GB, such as llama3.2, can be downloaded and tested with minimal time and bandwidth before committing to larger models.
- Updating environment variables and ensuring proper firewall rules are essential for remote access or network sharing of Ollama models, but expose risks on untrusted networks.
- Common setup issues, like unrecognized commands or stalled downloads, resolve quickly by checking PATH updates, driver updates, or re-pulling models.
- The official installer sets up Ollama in user mode without admin rights, saves models in a default location, and can be moved or reconfigured via environment variables for easier storage management.
Table of Contents
- How Do You Install Ollama on Windows?
- How Do You Verify Ollama Installed Correctly?
- Why Isn't Ollama Using My GPU on Windows?
- Where Does Ollama Store Models on Windows?
- How Do You Let Other Devices Access Ollama?
- What Should You Do When Ollama Setup Breaks?
- What GUI Options Work With Ollama on Windows?
- How Do You Update or Remove Ollama?
- Why Local Models Change How You Build Software
- A Faster Way to Turn Local Models Into Working Code
- Sources
- FAQ
How Do You Install Ollama on Windows?
You have two paths that both lead to the same place: a working ollama command and a background service ready to load models.
The simplest route is the official installer. Head to the download page, grab OllamaSetup.exe, and run it.
- Double-click the downloaded file. No administrator prompt appears because the installer sets up Ollama for the current user, not system-wide, and it adds
ollamato your PATH automatically. - Let the installer finish. It drops a tray icon near your clock, which means Ollama is running in the background as soon as setup completes.
- Open a new terminal window (PowerShell or Command Prompt both work) so it picks up the updated PATH.
If you'd rather skip the GUI entirely, open PowerShell and run the alternate install command:
irm https://ollama.com/install.ps1 | iex
This script does the same job as the installer but suits developers who script their machine setups or manage software through configuration tools. Either way, check for the tray icon after install. That icon is your visual confirmation that the Ollama service is alive and listening before you type a single command.
How Do You Verify Ollama Installed Correctly?
Open a fresh terminal and run:
ollama --version
If Windows says 'ollama' is not recognized, close the terminal completely and reopen it. PATH changes don't apply to already-open windows. Still broken? Manually add %LOCALAPPDATA%\Programs\Ollama to your PATH through Windows environment variable settings.
Next, pull and run a small model to confirm everything actually works:
ollama run llama3.2
You'll see download progress, then a loading step, then a prompt. Smaller models land around 2GB and finish in a few minutes on a decent connection; larger ones can take considerably longer.
- Test the API directly by visiting
http://localhost:11434in a browser. You should see a plain confirmation message. - Or run
curl http://localhost:11434from a terminal for the same check.
Pro Tip: Run ollama run llama3.2 before anything heavier. It confirms your whole pipeline (download, storage, inference) works before you commit to a 40GB model.
Why Isn't Ollama Using My GPU on Windows?
GPU acceleration is what separates a snappy local setup from one that feels like typing into molasses. Ollama detects NVIDIA and AMD GPUs automatically, but only when drivers are current and VRAM is sufficient for the model you're loading.
For NVIDIA cards, install the latest Game Ready or Studio driver directly from NVIDIA rather than relying on whatever Windows Update installed months ago. AMD users need a recent Adrenalin driver with ROCm support for their card generation.
When VRAM can't hold an entire model, Ollama splits the work between GPU and CPU, a behavior called partial offload. It still runs, just slower than a full GPU load.
- Open Task Manager, click the Performance tab, and select your GPU while a model loads.
- Watch "Dedicated GPU memory" climb. If it stays flat near zero, Ollama fell back to CPU only.
- Run
nvidia-smiin a terminal to confirm the driver sees your card at all. - If none of that shows activity, update drivers first, then restart the Ollama service from the tray icon.
Roughly this single check, dedicated GPU memory in Task Manager, tells you more about your setup's health than any other diagnostic step.
Where Does Ollama Store Models on Windows?
Ollama keeps two things in separate places, and knowing the split saves you from a full drive later. Models live in %HOMEPATH%\.ollama, while the application binaries sit in %LOCALAPPDATA%\Programs\Ollama. Logs land in %LOCALAPPDATA%\Ollama. A single 7B model can use several gigabytes of space, and it adds up fast if you're experimenting with several.
To move model storage off your system drive:
- Open Windows environment variables (search "environment variables" in the Start menu).
- Add a new system variable named
OLLAMA_MODELSpointing to your target folder, likeD:\ollama-models. - Restart the Ollama application so it picks up the new path, using the tray icon's quit and relaunch option.
- Re-pull any models you need. Ollama won't automatically migrate existing files from the old location.
If you'd rather redirect the entire install during setup, run the installer with a flag: OllamaSetup.exe /DIR="D:\some\location". That moves binaries, not just models, which matters if your C drive is genuinely tight on space.
How Do You Let Other Devices Access Ollama?
By default, Ollama only listens on your own machine. Opening it up to your local network or another device means adjusting one environment variable and one firewall rule.
Set OLLAMA_HOST to 0.0.0.0:11434 through Windows environment variables, then restart the Ollama service so the change takes effect. Two other variables worth knowing: OLLAMA_NUM_PARALLEL controls concurrent request handling, and OLLAMA_MAX_LOADED_MODELS limits how many models stay resident in memory at once.
- Add a Windows Firewall inbound rule allowing TCP port 11434.
- Test from another device on the same network using its IP address, like
http://192.168.1.20:11434. - Never expose this on a public or untrusted network. There's no built-in authentication, so anyone who can reach the port can reach your models.
Pro Tip: Bind to your local network only, never to a router's public-facing interface, unless you've put a reverse proxy with authentication in front of it.
What Should You Do When Ollama Setup Breaks?
Most Windows installation problems fall into four buckets, and each has a fast fix.
- "ollama is not recognized": close and reopen your terminal first. Still broken? Manually add
%LOCALAPPDATA%\Programs\Ollamato your system PATH. - GPU skipped entirely: confirm drivers are current, run
nvidia-smito check detection, then watch Task Manager's GPU memory graph during a model load. - Download stalls mid-pull: cancel with Ctrl+C, delete any partial blob files, and re-run
ollama pull <model>. SettingOLLAMA_DEBUG=1before launching surfaces more detail if it keeps failing. - Service won't start or port conflicts: check Windows Services for a stuck Ollama process, look at Event Viewer for error logs, and run
netstat -ano | findstr 11434to see what's already holding that port.
Most of these resolve in under two minutes once you know which bucket you're in.
What GUI Options Work With Ollama on Windows?
The CLI covers most day-to-day use, but a browser interface helps when you want chat history, multiple conversations open at once, or a friendlier space for non-technical teammates to test a model.
Open WebUI is the most common choice. Install it with pip install open-webui, point it at http://localhost:11434, and you get a full chat interface running against your local Ollama instance, no cloud account required. Because Ollama exposes an OpenAI-compatible API at that address, most community tools built for OpenAI's format connect with minimal configuration.
- Use the CLI for quick tests, scripting, or automation pipelines.
- Use a browser UI when you want saved conversation history or you're demoing a model to someone else.
- Several other lightweight community front ends exist; check GitHub for actively maintained options before installing one.
How Do You Update or Remove Ollama?
The installer checks for updates automatically and prompts you when a new version is ready, so most users never think about version management. To uninstall, go to Windows Settings, then Apps, and remove Ollama like any other program.
- Uninstalling does not delete your downloaded models. They stay in
%HOMEPATH%\.ollamauntil you remove that folder manually. - Advanced users can grab the standalone
ollama-windows-amd64.zipinstead of the installer, useful for portable setups or scripted deployments. - Want Ollama running as a persistent Windows service instead of a tray app? Tools like NSSM can wrap
ollama serveinto a proper service.
Why Local Models Change How You Build Software
Developers used to assume you needed Docker or WSL just to run a model on Windows. Native support removed that friction entirely, and it's changed how I think about quick iteration on code tasks: no container startup, no network round trip, just a terminal and a prompt. That immediacy matters more than people expect when you're testing a refactor idea ten times in an hour. A local model host is the foundation. Pairing it with a higher-level desktop agent is where the real workflow gains show up, something worth exploring once your Ollama setup feels solid.
— Gabriel
A Faster Way to Turn Local Models Into Working Code
Running Ollama gets you a model that answers questions. It doesn't edit your files, run your terminal commands, or manage a multi-step refactor across a project. That gap is where Gnamiai comes in.
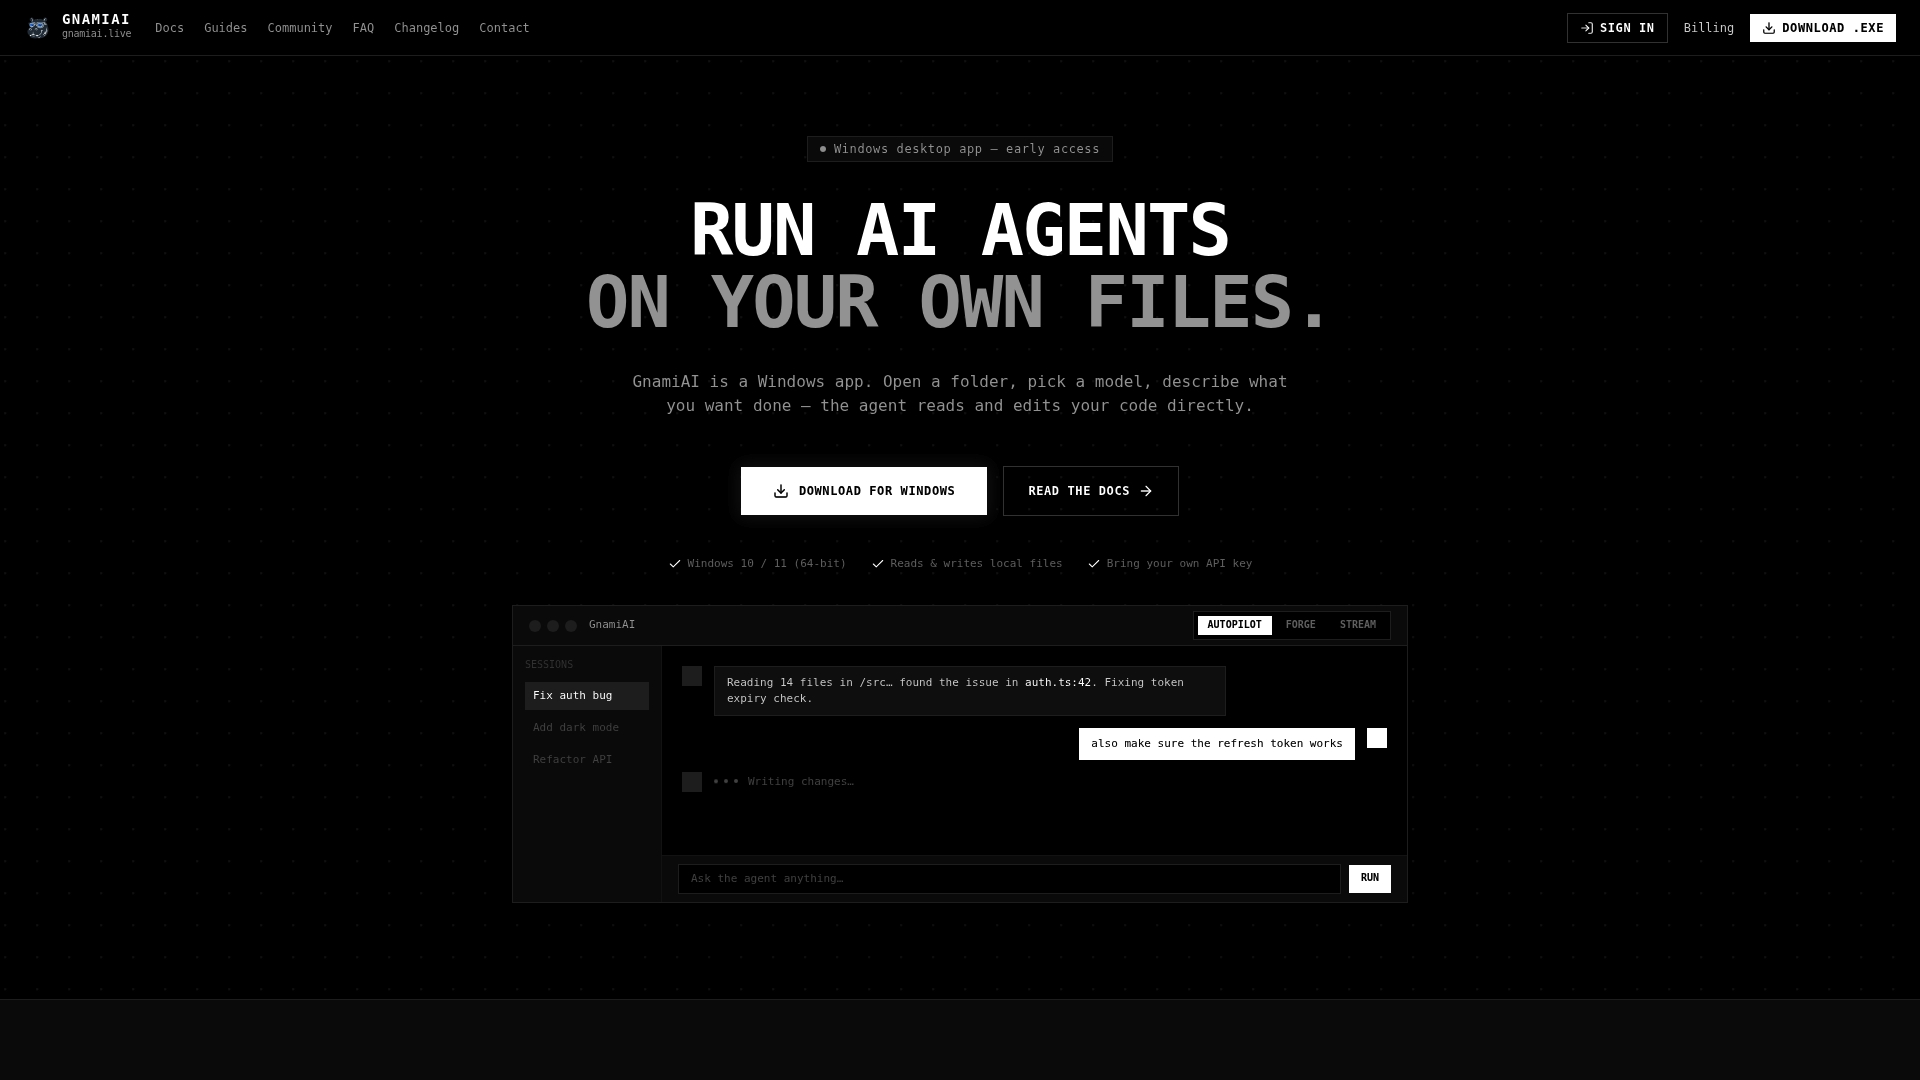
Gnamiai is a Windows desktop application built for developers who want an AI agent working directly inside their project folders, not just answering prompts in a chat window. Open a folder, pick a model, describe the task, and Gnamiai's agent reads, edits, and executes commands in that workspace. Three modes cover different needs: Autopilot for hands-off task completion, Forge for structured file editing, and Stream for closer, step-by-step control. Every change comes with instant rollback, so an agent mistake costs you a click, not an afternoon.
If you've got Ollama running locally and want that model doing actual work in your codebase instead of just chatting, check out the Pro plan at $29 per month and see what a file-aware agent adds to your setup.
Sources
FAQ
Does Ollama Work on Windows?
Yes. Ollama has a native Windows installer that runs without requiring administrator rights and supports Windows 10 22H2 and later, according to the official documentation. You don't need Docker or WSL to run it.
Can Ollama Run as a Windows Service?
Not by default. The standard installer runs Ollama as a background tray application, but advanced users can use the standalone CLI zip with a tool like NSSM to wrap ollama serve into a persistent Windows service.
Why Does Windows Say "ollama Is Not Recognized"?
This almost always means your terminal opened before the PATH update took effect. Close the terminal completely and reopen it, or manually add %LOCALAPPDATA%\Programs\Ollama to your system PATH if the problem persists.
Where Does Ollama Get Installed on Windows?
Binaries install to %LOCALAPPDATA%\Programs\Ollama, while downloaded models live in %HOMEPATH%\.ollama, per ReadTheDocs. You can redirect model storage by setting the OLLAMA_MODELS environment variable and restarting the app.
What Does Gnamiai Cost?
The Gnamiai Pro plan is $29 per month, giving developers access to the desktop agent's Autopilot, Forge, and Stream modes for direct file editing and workspace automation.